Thursday, 3 December 2015

Creative liner by me

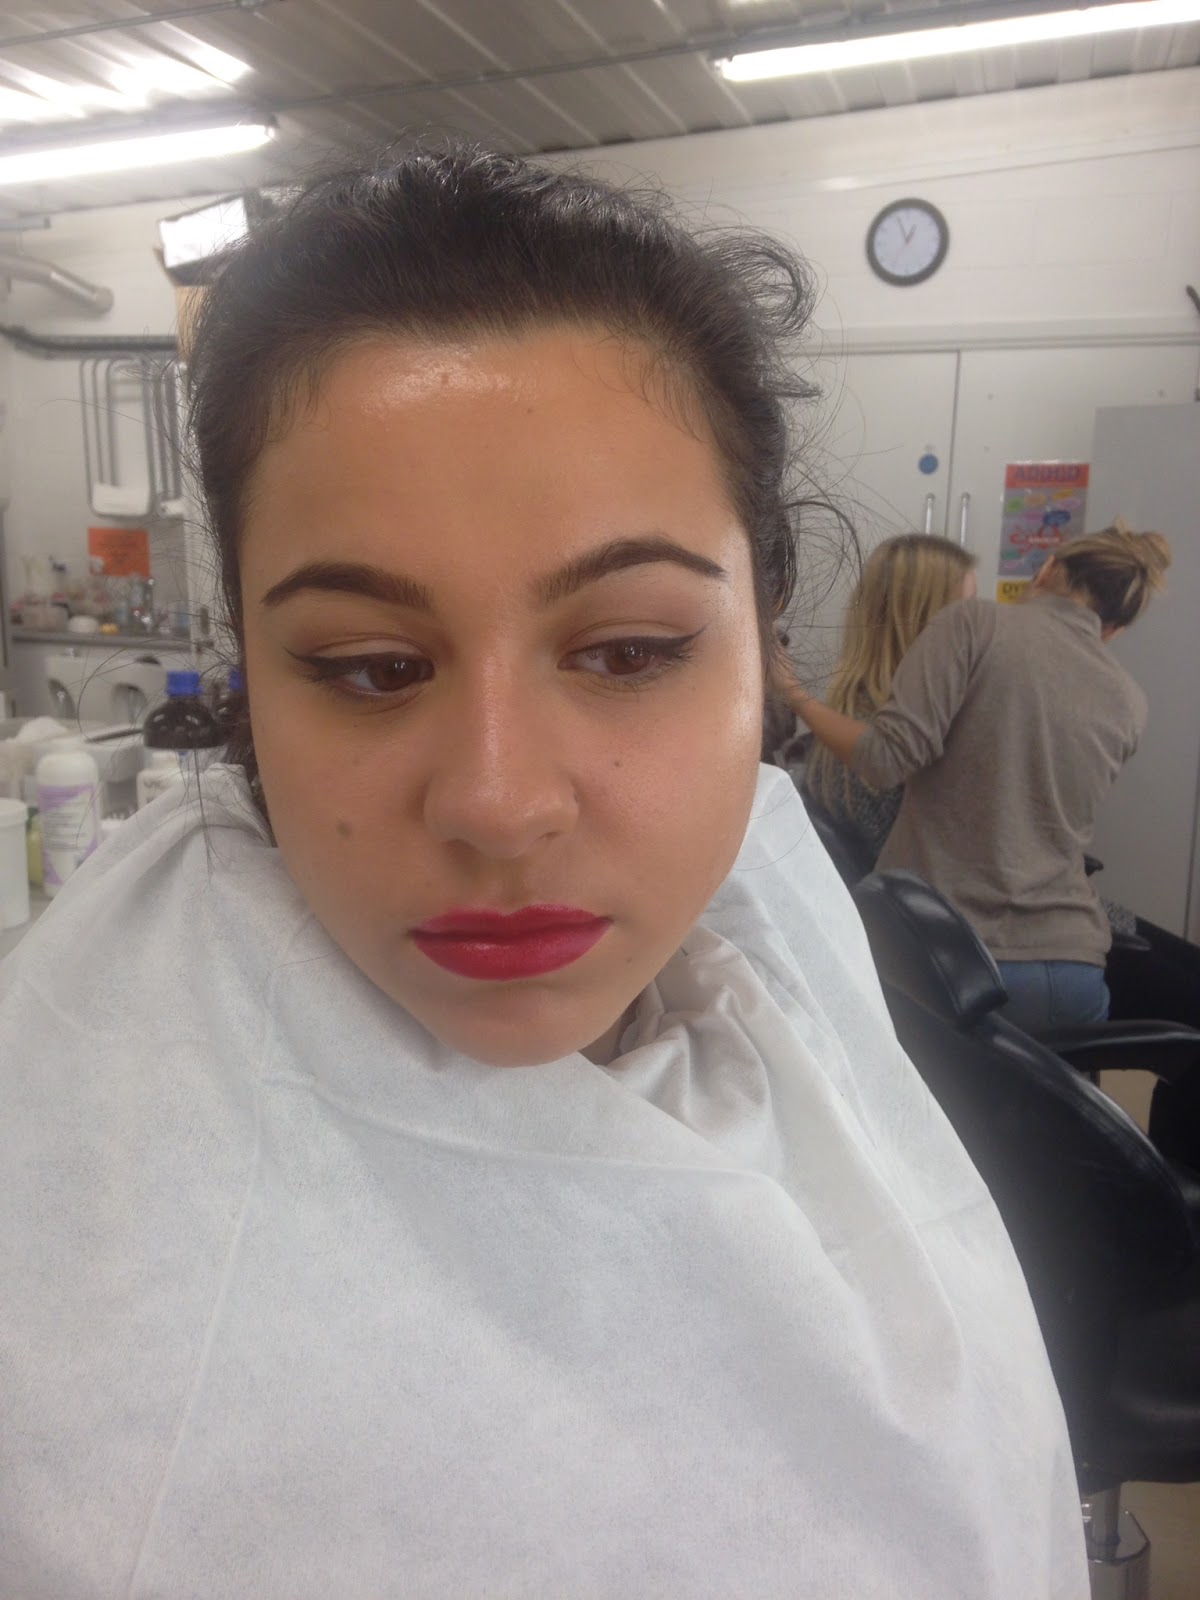
After Branka showing us the creative liner was our turn to create liner for catwalk, which I was really excited about as I just love applying these beautiful looks for catwalk as I feel it can be really plain and simple as less is more they say or could create something really wacky but today I wanted to apply what think would be great for catwalk!

So I started off prepping my models skin cleansing the skin making sure its a fresh canvas and working moisturiser into the skin as the skin did appear a bit dry to myself . Now my skin was ready I applied the base first instead of the eye as I was only really applying liner so this wouldn't cause any drop page and ruin my base. For this look I was aiming for more of a full coverage and had worked with my model before I did prefer applying this base as I felt worked better giving more coverage. So mixed NC15 and NC25 as my model is has quite a pale skin tone but does have a bit of colour to the neck so I mixed a warmer tone than her face as her neck does had a hint of colour. Once mixed and felt I mixed the correct tone I applied to the bottom of her jawline and then buffing this in and down the neck slightly blending it in making sure I've mixed the correct tone, as I did mix the correct tone I went on to applying all over the face with my buffing brush blending and buffing in circular motions this is so its all blended well into the skin and buffed out well. I would normally conceal with my MAC concealer pallet but after applying the base it gave quite good coverage but I did need to conceal some areas  so I just used left over base from the back of my hand just pressing it lightly into the skin with a small flat brush. Once all my base was perfect I went onto setting the skin with Ben Nye super white but just dusted this over the face nothing to heavy just to set the base. Moving onto my liner, I used MAC black track as mentioned in other posts I am not a fan of black track really do need to invest in a better liner as this just isn't black enough and tend to have to repeat over a few times to get a good black from it, but this was the product I used today starting from the middle of the lid in small brush strokes taking the liner where the brow bone would naturally stop not taking it out into a flick but curving up and then taking the liner just over half way on the lid but following the shape of the eye not into a straight line. Then taking a line from the brow bone joining to the bottom of the liner in the lash line. Finishing the eye's taking carbon MAC placing in the outer corners of the eyes blending the colour towards the centre of the lid. To finish the eye I applied mascara to the lashes and for the brows I wanted to give a high fashion look I didn't  take through any colour but applied brow gel MAC brushing the brows and brushing them upwards giving a spiky look to them. For the lip I mapped out the lip with MAC black liner and the filled the lip with my black track liner MAC applying to the lip using an angled brush to really get the pointed lip.
For the contour I used rimmel  bronzer tone medium just giving slight warmth to the face nothing to heavy just lightly dusted over the areas the sun would naturally hit the face but to the bridge of the nose applying to sides of the bridge with black carbon MAC just very lightly as I wanted to give a try to see how it would look and I felt it worked really well!


Products used

Base: MAC full coverage NC15, NC25 mixed
Powder: Ben Nye super white
Liner: MAC black track liner
Shadow: MAC carbon
Brows: MAC brow gel
Lip liner: MAC black eye liner
Lipstick: MAC black track liner
Contour: Rimmel medium bronzer, MAC black carbon shadow

Evaluation

Applying this look I did really enjoy it was most definitely a challenge as making sure both as were both at the same balance as I did find this quite hard as I done the first eye really well but then struggled on the second eye, as on the left eye it tended to be a slight lower on the eye than the right eye but it wasn't so noticeable but I did realise the left brow was a bit lower than the other brow so this could also be why. But I do need to practice on my symmetry as this is important in make up! And so for the lip just keep practising lips making sure I get the balance right consistently throughout my work, If I was to recreate this look I would make sure I apply everything to my work as I have mentioned in this evaluation and make even more of a creative eye liner.




Wednesday, 2 December 2015

Demo: Creative liner

This lesson Branka demonstrated how to give an creative liner for catwalk! Instead of your simple flick got more creative within this lesson...
Today Branka chose a model that already had a clean base as she wanted to get straight to showing us the creative liner so we could all get on with our looks. Starting the liner using blackest black liner which is like a face paint and is really good as black track from MAC isn't so great! So starting from the middle of the lid taking the liner to the to the outer eye stopping just after where the brow ends and then taking the liner back on its self just slightly under the brow stopping where the brow starts. Starting from the middle of the lid again but taking into the corner of the eye, once mapped out her shape Branka went back in with her liner making areas more thicker finishing on top of the lid went under the eye created a creative liner to match the upper eye. Taking to where the corner of the eye but lower and creating her shape from there bringing it to the outer eye finishing the liner went in with mascara giving the eye that finished look.
Using her same product mapped out her models lips with black MAC pencil giving the top lip more of an angled point filling this then with the liner as this gave such a strong black.


                (Fig 1, Creative liner, model Heather Shotbolt, Make-up artist Branka Vorkapic, 2015.)

Monday, 30 November 2015

Simple liner and creative lip by me ..

The main aim for my final look today was to apply a simple liner and creating creative lip by building from the original red lip developing into a ombre finishing with a glitter lip.
Starting off prepping the models skin cleansing first then went onto moisturising the skin I found with my models skin she suffers with patches of dry skin under the cheek bone area mentioning past make up applications with other artists in the class found when applying foundation and then setting the skin tends to stick to these certain areas causing to ruin the base. So wanting to over come this for my make up look I did concentrate more on these areas applying the moisturiser with a buffing brush really buffing into the skin. As today I didn't have my face oil in my kit that would normally lock the moisture into the skin, so instead I used illamasqua hydra veil over the face applied with foundation brush which I feel works great for dry skin and gives an all over velvet feel and really helped the dry patches so when I go in with foundation and then set will be a perfect base.

For my foundation I used MAC face and body as I didn't want a heavy look but just balance out the colouring of the face to match the neck, so I used a straight C1 that works great for her skin tone as its exact match! Set the base with Ben nye fair literally just dusted over the face again nothing too heavy!
Once finishing the base I moved onto applying the liner feeling a bit nervous as I needed to get both eyes the same but relaxing and not thinking about it too much and going with the flow I used MAC black track liner which I've decided I'm not too keen on using as its not black, black and had to build the liner to get a bolder black. Starting at the centre of the and bringing the liner to the outer of the eye not applying this in one stroke as this would cause me to shake and most definitely mess the liner up but apply in small brush strokes making this easier for myself taking the to the end of the lash line and to create the flick I added more product to my liner brush lightly pushing down on end of the lash line and flicking out my liner lightly taking my brush off the skin finishing with mascara brushed through the lashes and taking MAC brow gel throw the brows and just filling out with a little colour not much using a dark brown through the brow.
Finishing the liner on both eyes I blended MAC cork into the socket line as I wanted to lightly define the socket line giving slight depth making this giving definition to the eye area.
Onto the lip I did feel quite nervous I don't normally as I just naturally go onto applying the lip in any make up treatment but in this look I concentrated so much on the lip first mapping out with MAC lip liner Ruby roo, balancing the top lip to the bottom after taking me such quite a while as I was concentrating on this area as the aim was to get a perfect balanced lip but more I was concentrating on this area the more I felt, I kept messing it up. Finally felt I got a better mapping of the lip I applied Russian red to the lip and to and finishing touch using MAC vanilla pigment to the bridge of the nose and the height of the cheekbone just to bring those elements forward a little.


After completing my red lip look followed onto the ombre look using MAC black lip liner mapping the lip like before but when applying this I did take longer as I felt I did go bigger on the the lip which i shoudnt of done so this did slow me down as I needed to clean this up and go in again with the ombre lip, and then because I used face and body and I didn't matte the skin loads I found it was working on a very slippery surface and this did show a messy application I felt so this did slow me down cleaning this up too and I will be mentioning all this in my evaluation of what I will do next time to prevent this from reoccurring again in my work. So below I have inserted my ombre lip but due to me spending so much time on the lip I didn't get round to applying glitter to the lip nor the lashes as I did run out of time.


Products used:

                                                           Base: C1 MAC face and body                                                        
Powder: Ben Nye fair
Eye Liner: MAC black track
Eyes: MAC cork ( socket line )
Mascara: MAC
Brow: MAC brow gel, MAC brun shadow 
Lip: MAC Russian red
Lip liner: Ruby roo, Black eye liner
Highlight: MAC vanilla pigment

Evaluation

Throughout this application I was putting so much concentration as I was trying my hardest to apply a perfect liner and lip especially the lip making sure its balanced. I did really enjoy applying this look as I think its a gorgeous look to wear but I did how ever concentrate so much trying to get the balanced lip but I found the more I was concentrating the more I was messing up as in recent make up lessons I just do it naturally without thinking into it too much and do a nice lip but I did find today was more of a challenge for myself as today I tended to keep going bigger than the lip which did cause a bit of mess and I did keep cleaning this up! Also found where I didn't set the foundation loads the skin seemed so oily as I did use face and body which is a very oil based foundation and when I applied the lip liner and I went slightly bigger than the lip and felt like it was applying to water. So when I do create this look again which I most definitely will as I love this look, I would set more round the mouth make it more matte as I would like to over come this and no repeat! And maybe not concentrating so much and going with the flow and hopefully will get in what I missed as I only done half ombre lip, no glitter lip and no lashes so next time I would really have to get my speed up!  


Demo: Simple liner with creative lip

For today's demo Branka showed the class how to create a simple liner and a perfect balanced lip developed into an ombre lip finishing into a glitter lip.
Branka as always firstly preppped her models skin making it was a clean canvas to work onto too and making sure there was no dryness on the skin that could interfere with her application.
Getting her foundation ready mixing YSL medium and dark together finding was a tone too dark so added more of medium to get the models tone once got the right tone applied to models face buffing and blending well into the skin and making sure blended down into the neck and very lightly dusted prep and prime over the face. Starting next with the eyes applying a light layer of brula to the whole lid and taking brun blended into the socket line and buffering this out just giving slight definition to the eye following the liner to the eye taking her eye liner onto a spactular preventing from her product drying up quickly, taking a small liner brush with her eye liner gel on  getting the model to close her eye and applying this to centre of the eye taking it to the outer eye then adding some more product pressing at down on the line on the outer eye and gradually bringing the brush off the face this will create a perfect flick, then to apply the liner onto the inner eye getting her model to look down and looking to the outer corner this is to make applying to inner/ corner of the eye a lot easier!For the lip to give a balanced lip, this is very important for camera as if you don't balance the lip for camera this will show up and having an unbalanced lip will ruin the whole image so this was the main aim of the lessons getting a strong balanced lip!
Branka firstly mapped out the centre of the lip the top and bottom with MAC liner ruby woo 


Above showing images of  the lip mapped out before applying to the whole lip doing this is helps to balance the top lip to the bottom, once done so applied Ruby roo lipstick to the lip also to compliment the lip used a gold pigment applied to the bow of the lip and trhe corner of the eye nothing too much just to give that hint of highlight.


Followed onto an ombre lip out lining the lip with MAC black eye liner mapping the lip as done previous with the red lip, then pulling the colour into the lip making it fade into the lip that gives the ombre look.


To finish the final look applying glitter to the lip, this lesson has shown us how to build a lip not take away each time you apply but build your lip as Branka shown us applying a red lip following into an ombre and finally a glitter lip but not once did she take any of the product off just applied what would work! Its helpful to us student to see because its great to know on set of photoshoot if you need to quickly change your look within 5 minutes.


Final look


Friday, 27 November 2015

Fashion hair : Heated rollers

This week Emma demonstrated to us how to apply a brick set with heated rollers, basically same as last week how we applied the rollers but instead of applying to wet hair and using the portable dryer, we will be applying to dry hair and just dampening down with setting spray not getting the hair wet just 2 sprays on each section to help when rolling the hair and letting the heated rollers create curl and bounce ready for us to dress out into style.

Firstly making sure our heated rollers were turned on so throughout our demo they would be heating up ready for us to apply doing this giving time for your rollers to heat up will cause them to be hotter which will create more curl and bounce to your set even though they are really hot to work with which I've noticed has helped me put in rollers a lot quicker as the heat makes you work quicker not wanting to burn your fingers!!

To start I combed through my block's hair starting from the bottom working up the hair making sure there are no knots and doing this is so I get rid of any knots as if I was to start from the top I would be creating a be knot at the bottom of the hair for myself to battle with so this way helps get rid of knots and not causing any damage to the hair working upwards.Once all combed I side parted my blocks hair making the left side of the head more of a heavy feel so when my set is taken out and and dressed out that side should be giving more volume and bounce!
Starting from the front sectioning my hair from ear to ear making sure each section isn't more width than the roller or length as previous roller sets as I've created before will cause over hang of the roller, also making sure my sections are neat and straight once got a correct section I combed through holding tension on the hair holding at a 45 degrees angle really making sure I have tension as its will show in your set as I want this tight and rolled straight up to the root of the head, while doing this I gave the section 2 sprays of setting spray this helps me to keep the tension as if was soft and no setting spray added I would most definitely find putting the roller in hard as end of the hair is a lot thinner and trying to grip the hair to the roller just always seems to slip through so spraying the ends I found really helped me to start my roll off and used my tail comb throughout making sure all the ends were kept in and preventing any fish hooks! After sectioning and setting my whole front of the block I went onto setting back of the hair into a brick set doing this as I don't want a uniform set which is sets going in straight rows all one after another where as a brick set is more movement in the set which is more like a brick wall and will give more movement when you take it out. When I had applied all my set I waited till all rollers had gone cold because if I was to take them out when still warm this would cause my set to drop! So once had all gone cold starting from the bottom of the head taking out my rollers working up the head to the front sections, cause if I was to start from the front and work my way down the head I would constantly be lifting up hair to take out the roll underneath so this does make more sense to undress the hair this way! Now all of my rollers are out i brushed through the block using a denman brushing and smoothing out and started using my silver clips to keep all waves in place and then setting the hair with hairspray.


Final image


Evaluation

All throughout this set I felt more confident as we have been doing a few sets now as we currently are also doing in out period hair which has most definitely help me speed up and my sections are becoming neater , and one thing I was finding very hard at the start was keeping the tail comb in my hand all throughout the set and whipping it round to use on each section keeping the ends in trying not to create any of those fish hooks! Practice does make perfect, my sets are most definitely not perfect yet but one day they will be! As I've already seen so much improvement in my work and tend to carry on practising my sets making them perfect! I was really happy with my whole set but with my final image when I dressed out and silver clipped my waves into place  but as you can see above it didn't really enhance them at all but this was due to not being left in long enough I felt so if I was to create this again I would have left them in longer with more hairspray also make my style more neater as you can see that style isn't ready for camera as you can see fly away hairs coming away from the hair so to over come this next time maybe use a hair serum and shine spray to finish the look completely. 

Monday, 23 November 2015

The Creative Lip


Classic smoky eye

First cleansed my models skin, applied oil and for the moisturiser instead of just applying the moisturiser to the models face like I normally would with a pad or my fingers I used foundation brush getting this to soften the brush ready for the foundation as I will be using full coverage and find this foundation quite hard to buff into the skin as I find it quite an tough foundation to work into the skin so knowing this tip will hopefully help me work the foundation into the skin easier and hopefully come to terms with using this product as I'm not such a fan of full coverage for this reason!

Starting with the eyes first taking MAC black track eye liner onto a spectacular the reason being for me working from the spectacular is because if I was to work off my hand the gel liner would tend to dry up so working from this instead wont dry up so much and wont loose product.
Applying liner taking the liner up to the crease and no higher once applied liner all on the lid working into the lash line lifting the brow to get right into the lash line I then applied to the water line and using a cotton bud to soften the underneath to take away any harshness and gives more of a smoky look!
To really darken the black liner on top of the eye I placed carbon on the lid pressing this into lid building this colour making it more black than black but not taking this any higher than the crease, blending brul onto the brow bone using a fluffy blending brush for the eyes as I didn't want this to be bold on the eye but just to slightly bring the brow bone forward following onto blending cork into the crease once done blended the final colour bringing this slightly lower using the colour brun all from the MAC shadow palette reason being for me adding these and blending them out above the black is because I think its always nice to have your blend out colours as it shows depth to the eye look and shows dark to light from you lid up wards towards the brow giving a nice finish. Repeating this but on the lower lash line layering the colours first applied cork then brun and final colour carbon which I buffed out on top making them smokey, to finish the eyes I applied mascara to give the finishing touch to the smokes.
For the base I used MAC full coverage highlighted using NC15 everywhere of the face I wanted to bring forward for the contour colour I used NW25 this was to put depth into areas I wanted to create depth on my models face what will also help the highlighted areas bring forward more, I started working into the highlight first and set lightly as I wanted a dewey look. Then worked the contour colour by buffing into the skin.
Once highlighting and contouring my model and making sure all blended and buffed into her skin, this being important its worked into the skin well as contour if not blended well can look dirty and not contoured so is always important this section it worked in well within the face. Following on defining the brow's combing through MAC clear gel and worked tope into them with a flat brush and lightly buffed the brows up doing this making them look on point framing the face well.
Going back to the eyes to make these really dark I worked carbon into the back of my hand so this wont cause any drop out when working back onto the lid and taking it under the eye using her pencil brush and used tope on top to soften out then buffing in brul finishing the the lower line.
Back to carbon again to work into the lash line lifting the brow to press the pigment into the lid really building this colour to make it bold, finishing the eye applying mascara through the lashes.

Finishing the skin I applied rimmel bronze light/medium applying to where the sun would naturally hit the face but not applying heavy just lightly to the face to give a warmth feel to the face. For the lip I created a nude lip so used naked lip liner to outline the lip and then for the lipstick mixed a tiny bit of plum to the foundation and mixed what gave a nude colour applied to the lip adding gloss on top, so we applying the lip but nothing bright or too much as we are making it all about the eyes! And you should always make it about either the eyes or the lip never too much going on otherwise you don't know where to look giving you no focus point.
And for final touches used vanilla pigment MAC to the highlighted areas applied with a fluffy brush really making those cheekbones stand out and look on point for camera!

                                     Classic smoky eye


Above is my final image of the classic smoky eye, next to vamp it up a little....

                                       Glossy smoky eye

To vamp the classic smoke giving that high fashion feel I applied Vaseline to my models lids with my ring finger taking this over the lid only taking this up to the crease and no higher like done previous with the black track liner giving the carbon a really gloss shine. Giving extra gloss to the skin I also applied down the bridge of the nose and the highlight of the cheekbone. Finishing the vamp look I applied MAC plum to the lip to change the lip tone from nude to a darker and deeper tone to really vamp this look up.


                                            Products used:
                                                               
                                                           
Base: Highlight- NC15 Contour- NW25
               Eyes: Lid- Carbon, Crease- Cork, Below Crease- Brun   Brows: brow gel MAC, shadow- Tope
Powder: Ben Nye- Fair
Extra Contour: Rimmel bronzing powder light/medium
Lips: First lip- Nude MAC liner with added plum MAC lipstick + gloss applied. Second lip- MAC plum
Mascara: MAC
Final touches: Vaseline

Evaluation

So the aim for this lesson was to create a classic smoky look the developing into a more vamp glossy look! When applying the gel liner to the models lid, like Branka had done I should of then quickly blended this out as you have to work with the product quick as it dry quick but I did forget this and instead of blending this out I actually went straight in on top with my carbon pressing this into lid and then buffing the shadow and the liner both out together, me then thinking why isn't this blending out properly then straight away I clicked I had missed that step out! I wouldn't say it effected my final look as I'm really happy with my eyes but it did take me longer to blend out making sure they didn't look so blunt but a good blend but because the liner did dry it was a lot harder t buff out than if I hadn't of missed that important step out, next time working with it quick so its not making more work for myself than needed! I feel I really done well with this look and was really happy with the final outcome and think it really shows a high fashion image! Out of the two images classic and glossy smoke my favourite outcome was the glossy look everything just comes out at you more and in both photographs its the image that catches my eye the most and I just love the final outcome! If I was to re-create this look I would make sure I don't forget the important step! So that I do get my application done in 30 minutes and don't take so long on the eyes!

Practice of the smokes